Make a Payment
Last updated: April 22, 2025
Kickoff a payment on Mural by clicking the Move Money button and selecting the Pay option from dropdown.
Move money dropdown
Configure Payment Details
Configure your payment by following the prompts:
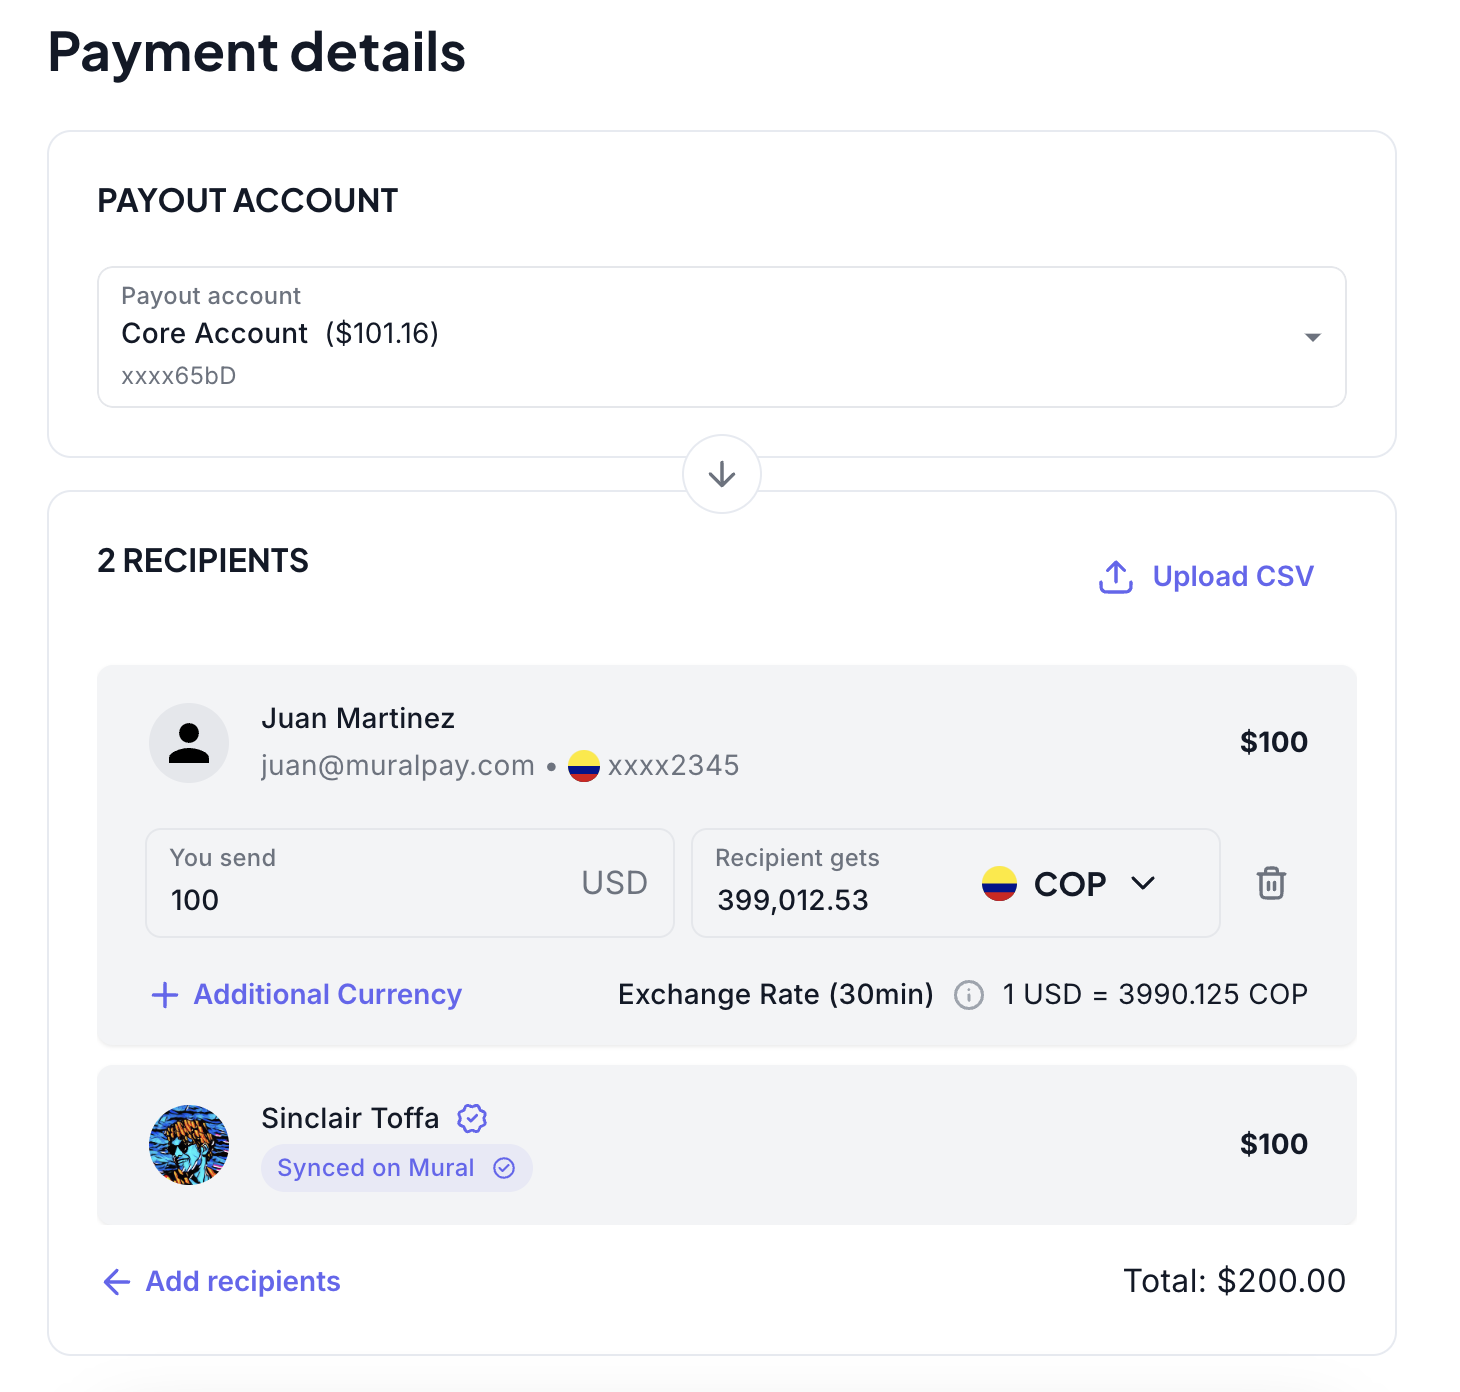
Payment Details - Choose a source Account, select your recipient(s), and the amount to pay those recipients. Optionally add a memo, attachment, or tags.
Schedule / Recurrence - If this is a recurring payment and / or needs to be scheduled for the future, you can configure that here. See Recurring Payments for more details.
After configuration, clicking Submit payment will send the payment to the approval queue.
Approve and Send
After a payment is submitted, it will show up on the Actions tab for an approval. Clicking the Approve button will prompt you for your Digital Signature. Upon signing (and reaching the approval threshold), the button will show a green Send Now. Click send to process your first Mural payment!
After a payments is processed (takes 3-10 seconds to confirm), it will be moved to the Transactions tab, which captures your transaction history.